
How To Make Jam With Amour Spreads

Email share
John Francis Ashley swangsong Amour Cafe

Don't Throw Out The Extra Fruit From Your Garden, Make Jam Instead!

We at Modern Gardener wanted to create a guide to making jam that our fans could use to preserve the hard-earned fruits and vegetables growing in their gardens. We went looking for some experts to help us and were lucky enough to strike up a fast friendship with the shop owners and master jammers at Amour CafĂ©. 

John and Casee Francis are the owners and operators of Amour Spreads and now, Amour CafĂ©. They started making jam about eight years ago from wild thimbleberries they foraged on the mountainside. Their first batch made roughly 300 jars of jam that they had to give away to friends and family. By all accounts, the thimbleberry jam was a hit. In 2011 they started Amour Spreads and won the 2016 National Good Food Award for their blackberry jam. 

Jam Prep Is Next To Godliness

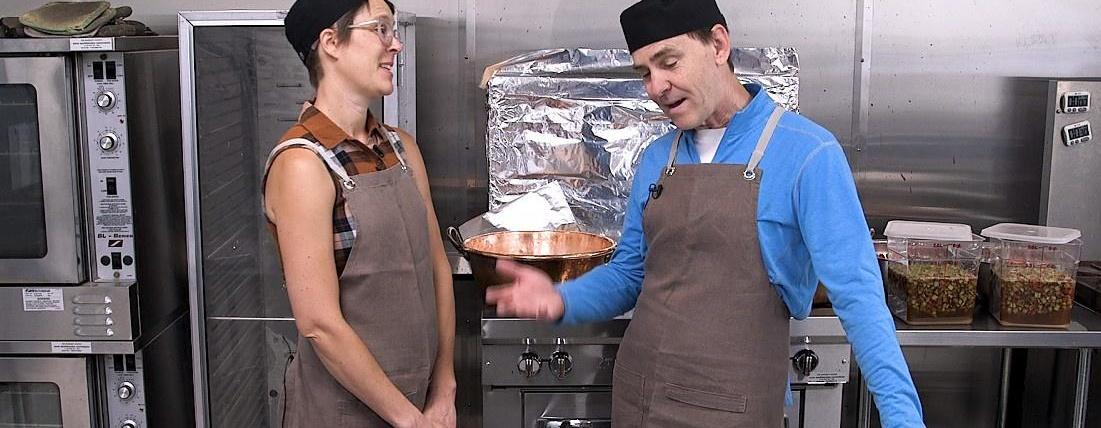
Jam making is messy and hot, so John has a few tips about preparing yourself and your work area in the kitchen. When the jam is in its last stages of boiling, it will likely splatter in every direction. In the jam kitchen at Amour Café, John prepares the stove and cooking area by covering unused burners and the stove backsplash with aluminum foil that can be quickly removed for easy cleanup. He also keeps wet rags on the floor in front of the stove, so that he can wipe up jam that splatters on the floor. This will keep him from tracking sticky jams throughout the cafe.

When making jam at home, take care to protect yourself. Wear a long apron and long sleeves to protect your skin from serious burns.

Equipment

  • A pot that is wide, and preferably made of copper for strength and even heat conduction.
  • Wooden spoon for stirring
  • Wide dinner spoon and bowl for skimming off and keeping foam
  • Canning jars and lids
  • Jelly roll pan to hold jars and lids while they are sterilizing in the oven.
  • Funnel to help pour the jam into jars
  • Heatproof gloves for handling hot jars

The process of making jam varies depending upon the ingredients used, but jam making is generally a three-step process: preparing the ingredients, boiling them down, and canning the cooked preserves in sterilized jars. 

Preparing The Ingredients:

  1. Select the best fruit. John recommends using fruit you would want to eat -- fruit that isn’t under-ripe or overripe. Also consider that under-ripe fruit will have more pectin than overripe fruit.
  2. Cut the fruit. In our video demonstration, we made strawberry and rhubarb jam. This requires a special step for the rhubarb, which needs to macerate in sugar and lemon juice overnight. Cut the rhubarb into pieces and then cover with sugar, add lemon juice, (recommended ratios in steps 3 and 4 below) and place in a container. The strawberries need to be cleaned, cored, and cut in half.
  3. Add sugar to the fruit. The ratio of fruit to sugar will vary depending on the recipe, but for this recipe, John used a 1:1/2 ratio of fruit to sugar. So for 1 lb of fruit, you’ll use ½ lb of sugar.
  4. Add lemon juice. Generally, a ratio of 1 tbsp to 1 lb of fruit will suitably activate the natural pectins in the fruit.

*A note: Amour Spreads makes jam that is fresh from the garden and free of any processed ingredients, like pectin. Pectin is an additive that can be bought at most stores and helps fruits used in jellies and jams set up into a firm, jelly-like texture quickly. However, fruit does have naturally occurring pectins that will cause boiled fruit to jell, albeit with a little more time on the stove. 

Jar And Testing Spoon Preparation

When you begin cooking your fruit, you’ll want to begin preparing the jars, lids, and also the testing spoons.

  • Preparing Jars and Lids:Wash, rinse, and air-dry the jars. Put jars and lids on trays to put into the oven, at 225 degrees for 15-20 minutes. This will sterilize the jar and heat them so that they won’t be shocked by the hot jam and break. Canning jars are designed to withstand high heat temperatures, so they shouldn’t explode in the oven or when the jam is put in the jar.
  • Preparing the testing spoon:Put a few spoons in your freezer for testing the jam’s firmness.

Cooking The Ingredients

  1. Bring the fruit to boil in a wide, shallow pot.Stir with a wooden spoon sparingly. You don’t want the jam to stick and burn onto the pot, but you also want to allow the jam to stay hot, so don’t over stir.
  2. Skim foam.Skimming the foam will keep the jam looking colorful, bright, and shiny. Leaving the foam in will make the jam cloudy looking. Tip: You can reserve the foam and use it as a flavored syrup in drinks and recipes.
  3. Test to see if the jam has set. When the jam is coming together and splattering quite a bit, take a tester spoon, spoon up some jam, and put it back in the freezer for about 3 minutes. How the jam looks after 3 minutes will give you an idea of the consistency of the jam when it’s cooled. You want the jam to hold together and stick to the spoon. When it has reached the desired consistency, it’s time to can the jam.

Canning The Cooked Preserves

  1. Pull your heated cans and lids out of the oven.Do not dally in this part of the process. The jars need to be filled with hot jam while they are hot to ensure a proper seal. If you see that the jam begins to boil once it’s put in the heated jar, that is a good sign.
  2. Pour the jam into the jar. Using a funnel keeps the mouth of the jar clean so that the jars will seal properly. But be sure that the mouth is completely clean, with a quick swipe of a warm damp rag.
  3. Screw the lid on.If you are using a two-piece lid system, the grocery store may also have a magnetic lid lifter that will help.
  4. Put the jars with the jam back into the oven for 10 minutes. This will vacuum seal the lids onto the jars.
  5. Pull the jars out.Be sure that the lids have curved inwards slightly. This means the lids have fully sealed.

Homemade jam can be good for up to a year, just be sure to inspect for mold if your jam is several months old.

We hope that this detailed guide has inspired you to preserve the bounty from your garden. There are many recipes that can be found online for jamming all types of fruit and vegetables, so don’t be afraid to be adventurous and try something new and share it with your friends, family, and neighbors. Happy Jamming!

If you live in Utah and have a garden or garden project that you'd like to be featured on Modern Gardener, click here!