


Hey! It’s Missy again! Artist and blogger with PBS KIDS Utah, here with another fun project. A few years back, I was looking for Christmas ornament crafts online. I came across a tutorial for hanging 3D art. I followed the simple tutorial and created an awesome paper mobile to decorate my bedroom. Here’s how you can make one too.
Supplies:
- 12” x 12” colored paper (or letter size cut to a square)
- Pencil
- Ruler
- Scissors
- Yarn/string
- Stapler
- Glue
Instructions:
- Fold your paper diagonally, opposite corner to opposite corner. This creates a triangle.
- Fold this triangle in half again. This creates a smaller triangle.
- Identify the longest side of the triangle (at the bottom), the single fold side (on the left) and the double fold side (on the right). Using your pencil and ruler, draw a line about ¼” in along the double fold side.
- Make pencil marks along the single fold side about ½” apart.
- Use your ruler to draw horizontal lines from the marks over to the pencil line on the double fold side. These don’t need to be exact, just eyeball it.
- Use your scissors to cut along these horizontal lines. Make sure to stop at that first pencil line.
- Open up your paper and lay it flat diagonally. There will be an upcut area right down the middle and lots of V-cut points getting bigger and bigger. Put your pencil in the middle and join the two tiniest points around it. Glue the points together.
- Skip the next two points. Take the third points from each side and glue them together.
- Skip the next two points. Take the fifth points from each side and glue them together. Repeat this step, skipping and glueing until you run out of points.
- Flip your paper over. Start in the middle, glueing those points you skipped. Glue the second points together. Glue the fourth points together. And so on.
- Cut a piece of yarn/string about 12” long and staple it to the top of your paper (you can tie it on as well).
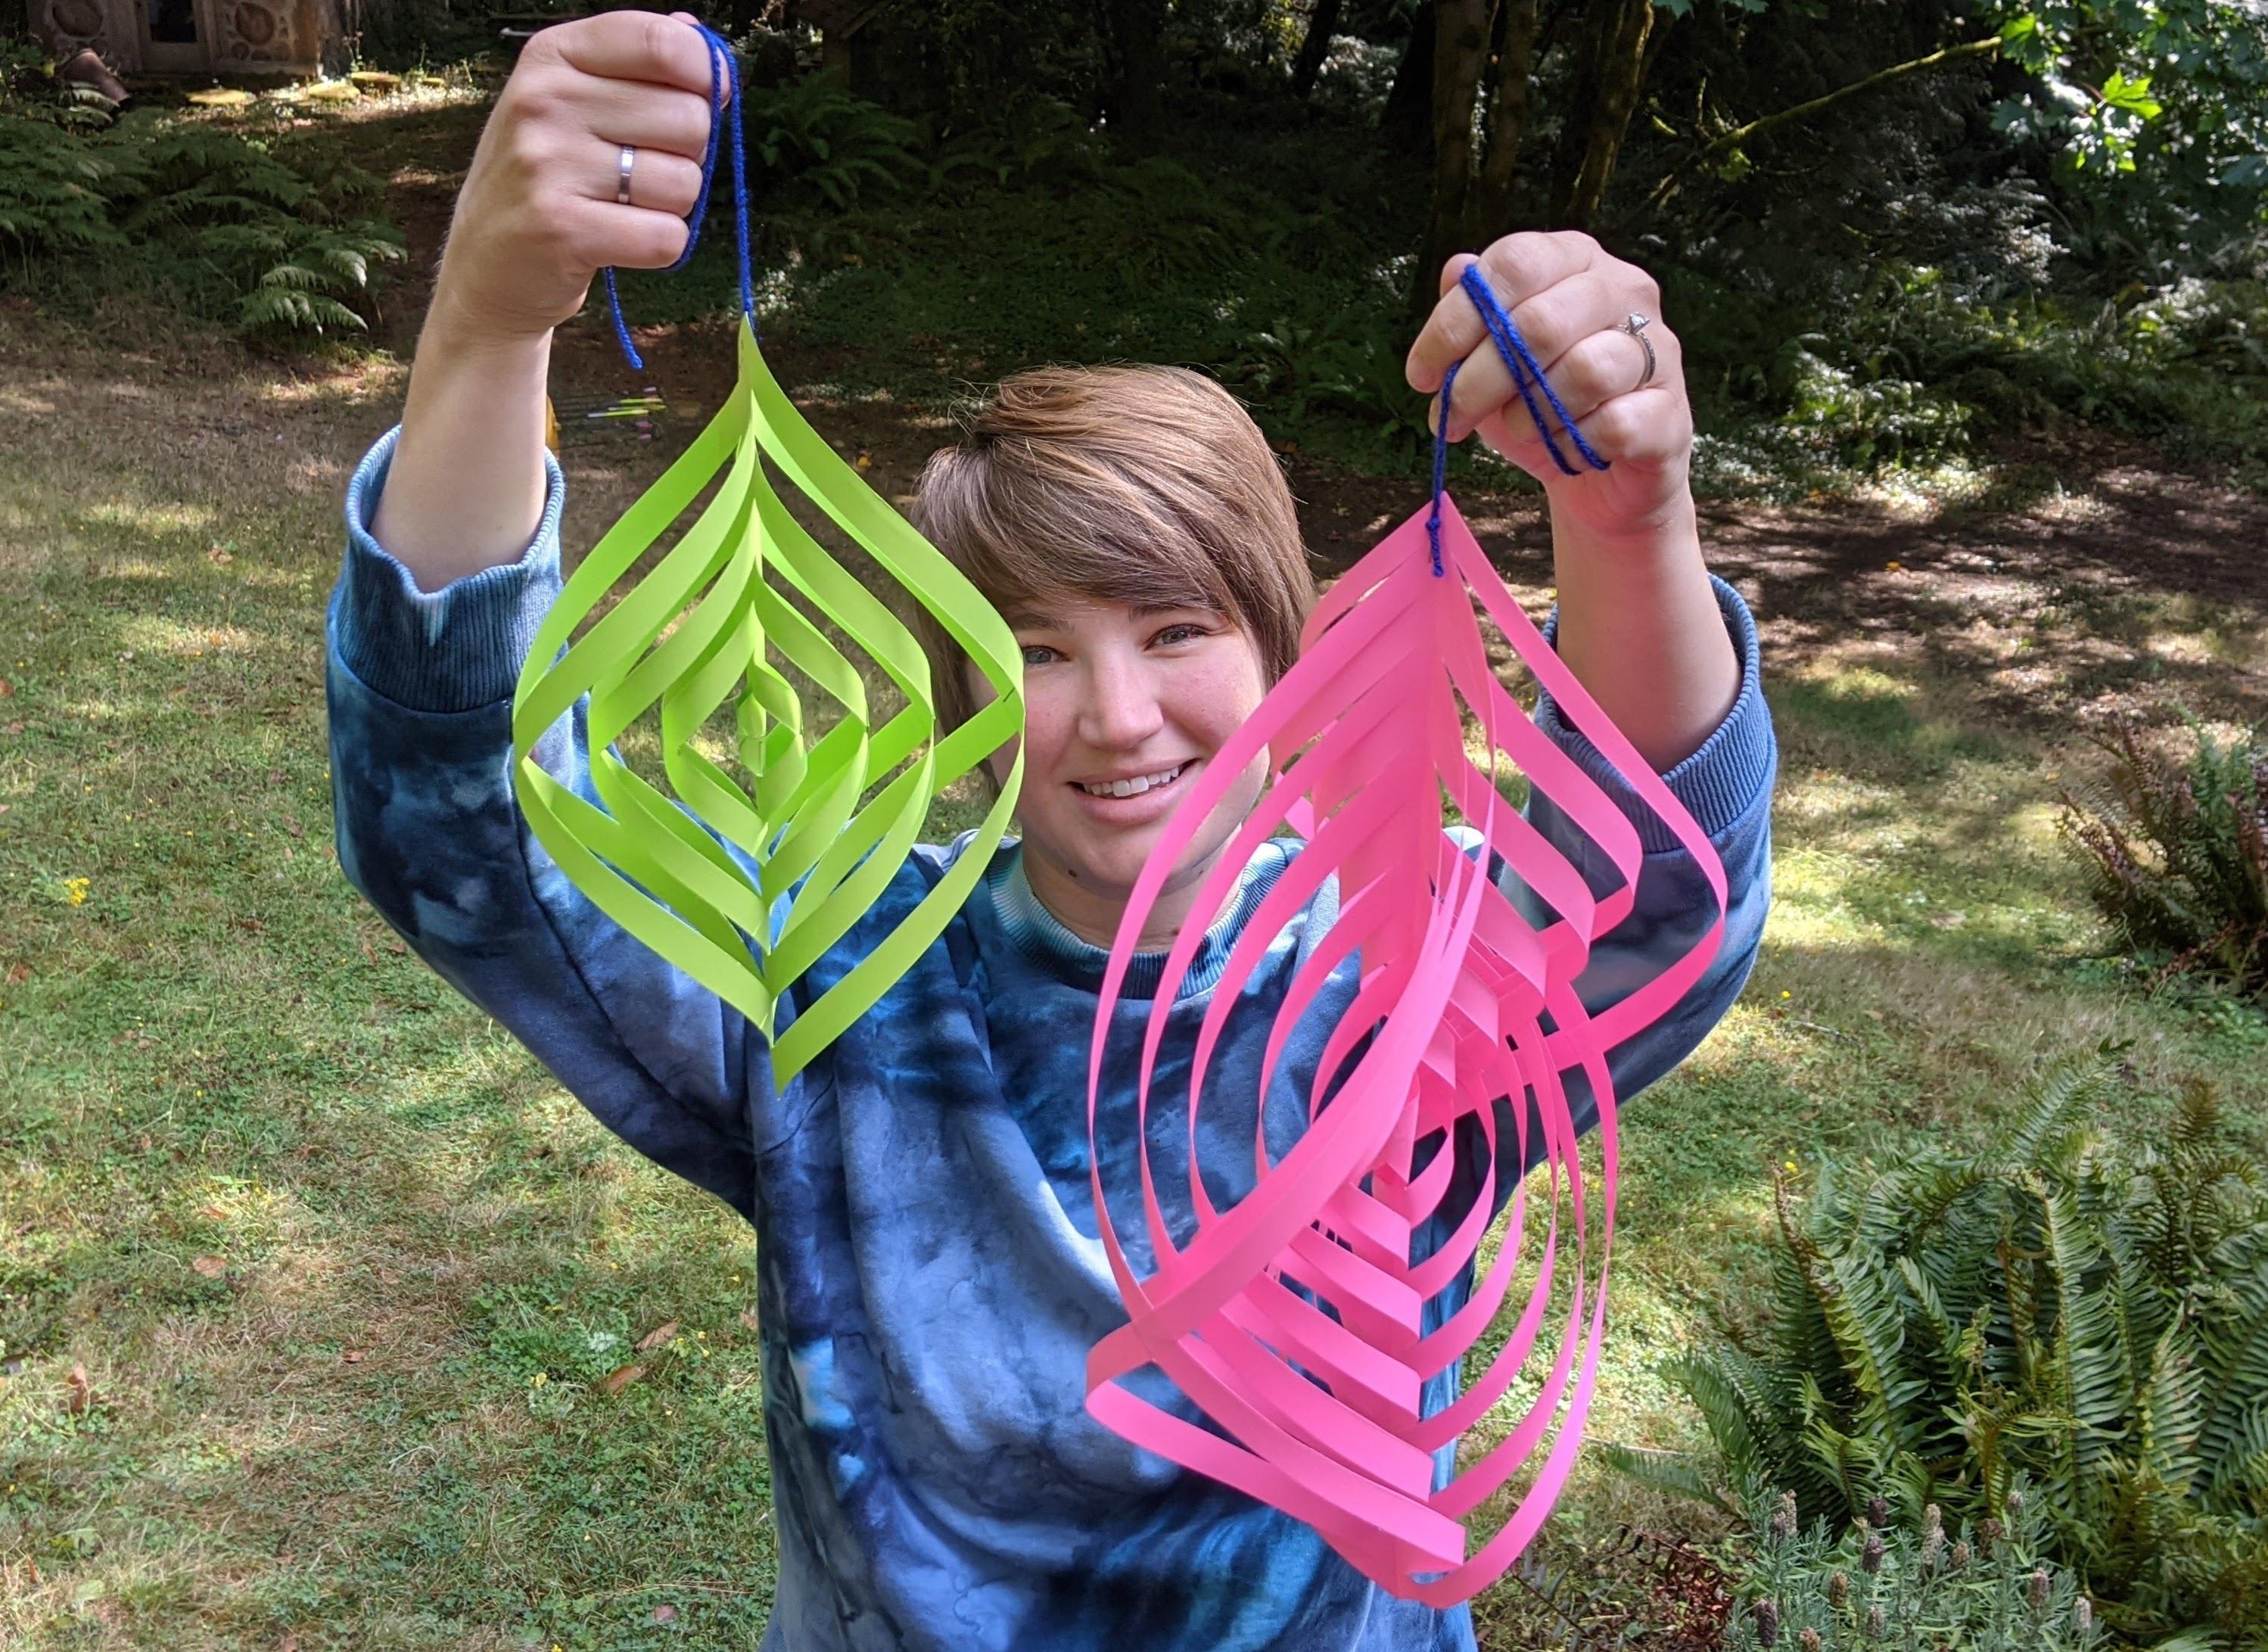
- Now your 3-D Paper Art is complete. You can hang it anywhere you like.
Wrap-up:
This is one of those projects that looks SO complex, but is actually very easy to make. Your friends and family will be so impressed with your cool 3D art project. Try making more in different colors and different sizes. Be creative and have fun!


.jpg)
.jpg)